
For many Tesla Model 3 owners, upgrading or replacing wheel covers is a quick way to enhance the vehicle's aesthetic and even improve range. Whether you are swapping out the stock aero wheel covers for a sleeker aftermarket set or simply replacing a damaged unit, knowing the correct procedure is essential.
This post serves as your primary Tesla wheel cover installation guide. We will walk you through the process step-by-step to ensure your new covers are secured properly and look fantastic. No specialized tools are usually needed; just your hands and a little bit of time. Let’s get started on this simple DIY service.
Preparation: Before You Begin
Before you attempt the wheel cover installation, it is crucial to prepare the area. You want to avoid causing any scratches to the underlying aluminum rim during the process.
Inspect the Wheel Surface: Take a close look at your current wheels. If there is significant dirt, brake dust, or grime, you must clean it first. A clean surface ensures the new clips engage correctly without trapping abrasive debris against the paint. Gather What Is Needed: You generally won't need heavy-duty tools. A soft microfiber cloth to clean the wheel surface and your new set of wheel covers are usually sufficient. If your new covers came with a separate mounting ring or specific adhesive strips, have those ready in order.
Step 1: Removal of Existing Covers (If Applicable)
If you currently have the standard aero wheels installed, you need to remove them first.
Grab the Edge: To remove the stock aero wheel cover, place both hands on the cover. Find a spot near the edge, preferably between the spokes. Pull Firmly: Give a firm, quick pull outward. You will hear the clips disengage from the spokes. Do not be afraid to apply significant pressure; they are designed to be removed this way. Separate Center Cap: Note that sometimes the center cap will come off with the main cover, and sometimes it stays on the wheel. If it stays, you might need to pop it out separately if your new cover has an integrated center cap.
Step 2: Final Cleaning and Inspection
Once the old cover is off, you have clear access to the naked wheel. This is the perfect time to perform a final wipe-down to remove any remaining dirt on the rim surface. Ensure the area is completely dry before you continue.
Step 3: How to Install Your New Model 3 Wheel Covers
Now for the exciting part: the actual cover installation.
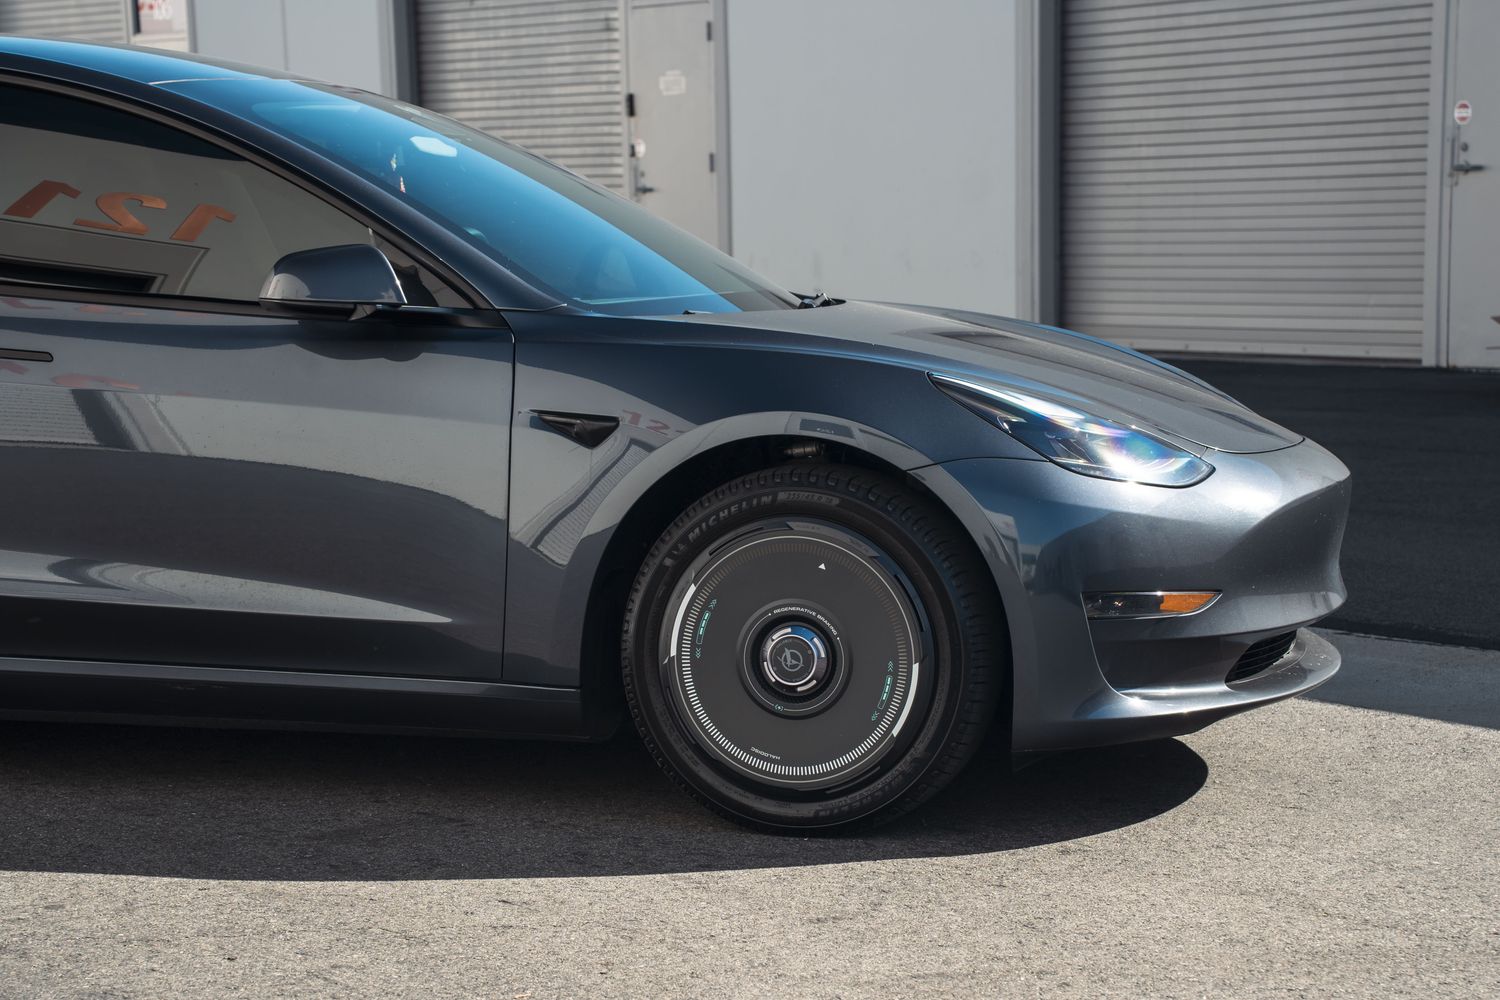
Understand the Mechanism: Most aftermarket Tesla Model wheel covers use a series of clips that grab onto the alloy wheel spokes, often supported by a metal or plastic mounting ring that provides tension. Align the Cover: Before you press anything, hold the new cover up to the wheel. You must match the position of the tire valve stem with the cutout on the new wheel cover. This is the most critical alignment step. Set the Center: Place the cover gently against the wheel, ensuring the center hole is aligned with the wheel hub. Press and Secure: Starting from the center and working your way out to the edge, begin to press firmly. You should hear audible clicks as the clips engage around the spokes. Apply firm hand pressure around the entire circumference of the rim to ensure every clip is seated. Install Center Cap: If your new cover uses a separate center cap, install it last by pressing it firmly into the middle until it snaps into place.
Step 4: Verify the Installation
Don't just assume it's done. Confirm the installation is secure to avoid the cover falling off while driving. Give the edge of the newly installed cover a few gentle tugs at different points around the wheel. It should feel solid with no wiggle room. If it feels loose, you may need to remove it and re-seat the mounting ring or apply more pressure to engage a stubborn clip. Watch a video tutorial if you feel unsure about the amount of force required.
Conclusion
Congratulations, you have successfully completed your Model 3 wheel cover installation. By following this step-by-step approach, you can ensure a safe and stylish upgrade to your Tesla. We hope you found this guide helpful. Please share this post with other Tesla owners and leave a comment below about whichwheel covers you chose for your ride.
Leave a comment
All comments are moderated before being published.
This site is protected by hCaptcha and the hCaptcha Privacy Policy and Terms of Service apply.